|
|
|
|
The Items menu option is used to manage Items for a particular project. This feature provides the Project Manager with the ability to limit which Items will be available for use on a project by project basis.
This screen is available on the Project Profile which is accessible via the Project >> List option.
If no project level item list is defined, then all active master items with a rate will be available for the project. If any items are specified for the project level, only the items specified will be available for the project.
Bill By, Bill Rates, and Bill Markups for the items specified at the project level can either use the default values from the master items, or they can be overridden at the project level.
Note that disabling a master Item will not disable any project level Items, but instead, will prevent the disabled Item from being associated with any new or existing projects. In this way, an administrator can define a subset of Items intended for use on specific projects, but then by disabling it, it will not be generally available for use on other projects.
This screen is available to users having the Project Manager, Project Manager Alternate, Administrator, or P&R Administrator role.
This screen is available with the Project Financials family of Unanet licenses.
Topics covered on this help page include:
You may also be interested in:
Setup Items (to set up Master Items)
Unit of Measure (to set up Unit of Measure for Item)
Expense Type (to set up Expense Type for Item)

|
|
|
|
|
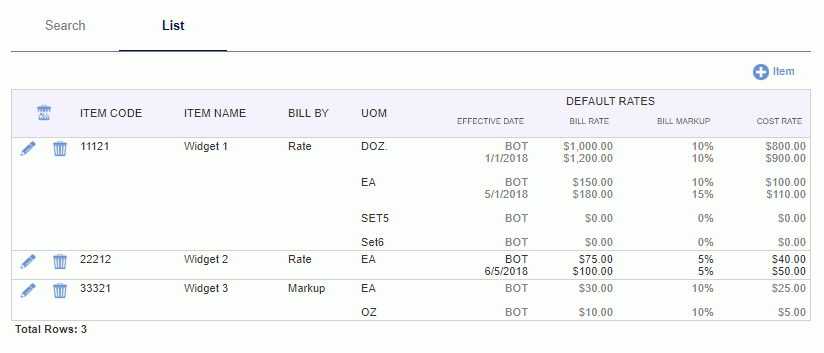
Note that you can delete all items using the (![]() ) icon.
) icon.
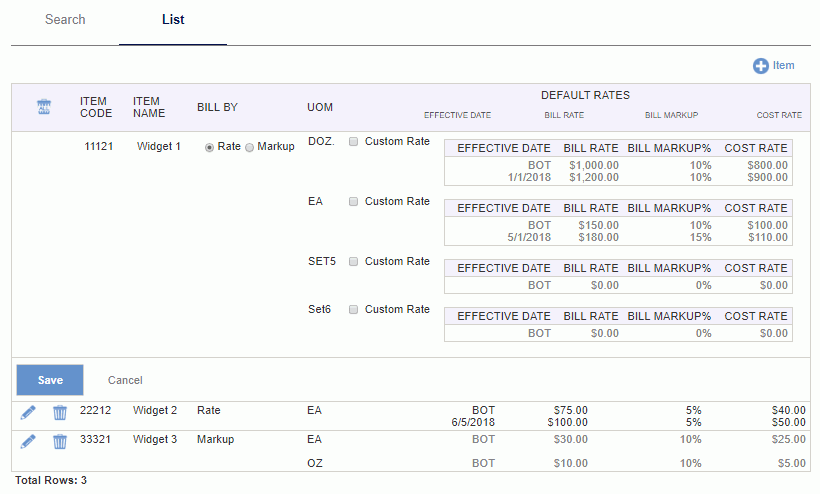
To add or edit project level item rates, you must edit the individual items via the List tab. Once in edit mode, you can either use the default rates or specify custom rates.
Defaulting to Master Rates
Following is a view of the item using default rates.
Custom Rates
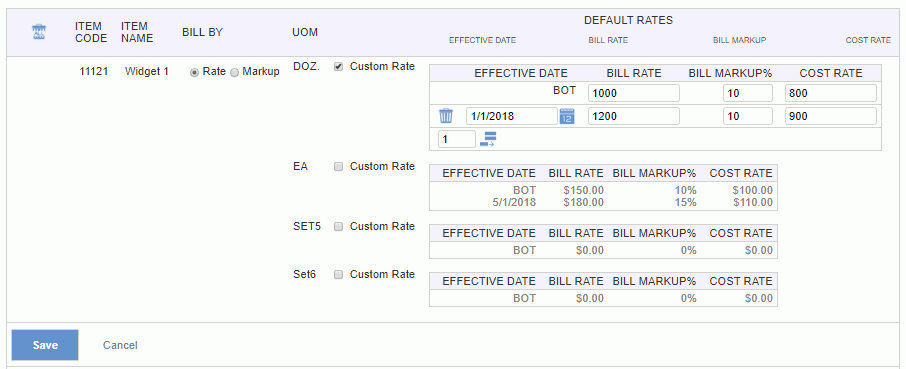
When you select Custom Rate, you can enter custom rates on a project basis. Click the Save button after you are finished editing.
The project level item list can contain a sub-set of the master item list (that is, you cannot define additional items unique to this project).
Add Project Items
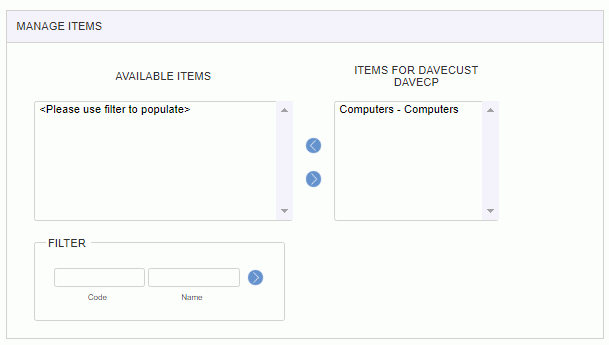
To add new project item entries, select one or many entries from the Available Items list and click on the right arrow button.
Remove Project Items
Similar to adding project item entries, in order to remove entries, simply select the desired items in the Items for <Project> window and click on the left arrow button.
|
|
The project item import feature provides the project manager with the ability to add active items to the project and update associated items with the project. The file must be in the current Project Item Import csv layout. Supply the name of the file to be imported and click on the import button. You can also control the level of informational and warning messages that may be returned to the screen.

Warning and error messages are written to the screen. See the Project Item Import help page for more information about importing project items.
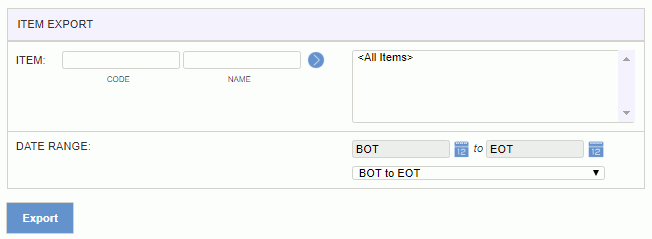
The project item export feature provides the project manager with the ability to save a csv formatted file containing information about project items on the current project. The layout of this output file will match the current Project Item Import layout.
This feature may be useful if you would like to manipulate the list of project items via an Excel spreadsheet, for example, or possibly create a similar list for another project from this project's list of items. In these scenarios, the project manager could export the list, make any desired changes via a spreadsheet, and then import the modified file using the Project Item Import feature (described above).
Using the options on the selection criteria screen, you can restrict which entries will be included in the resulting output.
Note: The rate information returned in the export will only include override rates specific to the current project where the effective date of the rate is within the Date Range specified. The Date Range will have no effect on the actual Items exported.
