|
|
|
|
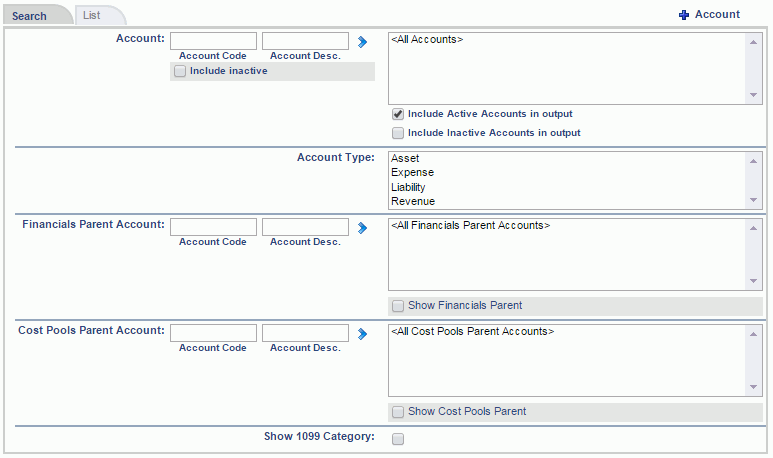
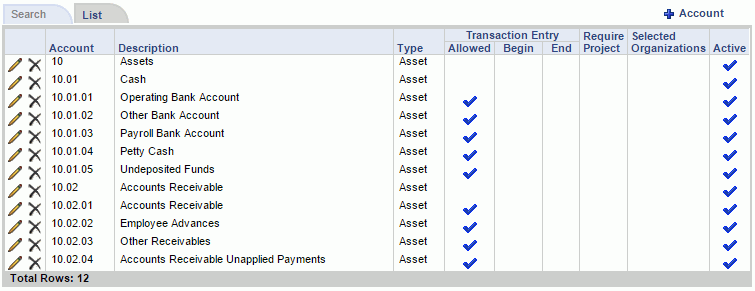
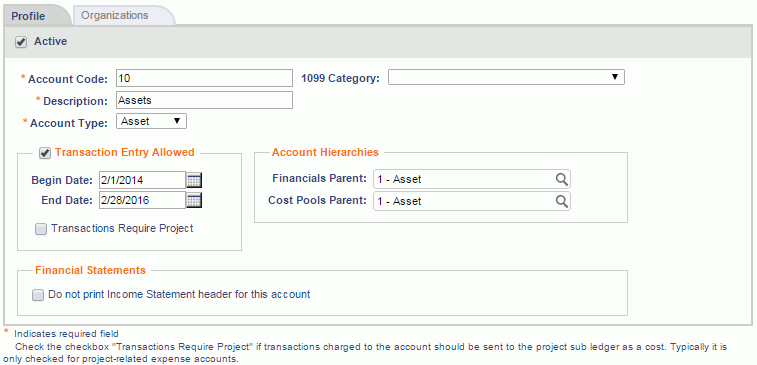
The Accounts setup screen is used to create and maintain the set of "natural" accounts (ie Chart of Accounts) that will be available for use in your system. On these screens, you can define the master list of accounts, identify the type of account (Asset, Expense, Revenue or Liability), determine whether the account is available for transaction entry (or otherwise be available for rollup / reporting), limit the date range transaction entry is allowed, specify whether project designation is required when charging to an account, define the scope of Financial organizations the account may be used with, define account hierarchical relationships for rollup activities, and activate or inactivate an account. Users can view the Financials and Cost Pools account hierarchies in a Tree View report.
Accounts can also be limited for use with selected Organizations (ie balance sheet accounts limited for use with a single company-level organization or marketing expenses restricted for use with marketing departments).
Once Accounts have been created, they can be associated with a variety of entities (e.g. Projects, Tasks, People, Pay Codes, Labor Categories, Expense Types, etc.), and using the concept of the Posting Groups, rules for which entities account information can be supplied during posting activities can be configured. Custom Posting Groups can be associated with projects and the system is delivered with a System Default Posting Group.
This screen is available to users having the Administrator, P&R Administrator and GLAdmin role.
This screen is available with the Project Tracking and Project Portfolio family of Unanet licenses.
Topics covered on this help page include:
Manage Entity Specific Account Settings:
|
|
|
|
|
|
|
|
|
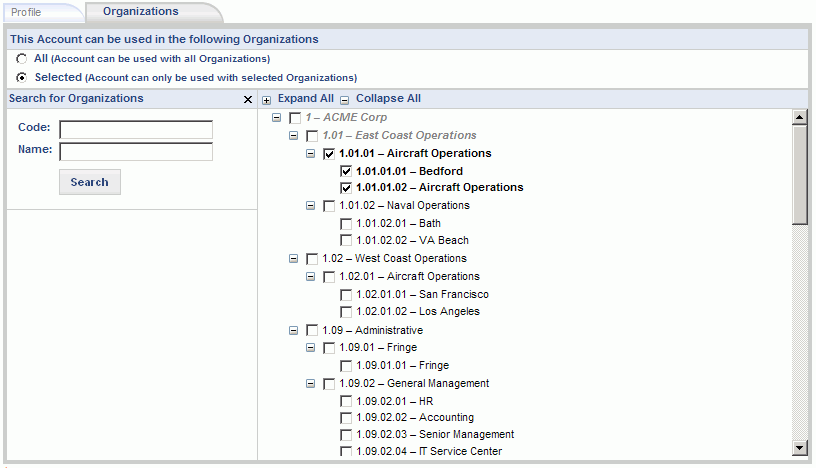
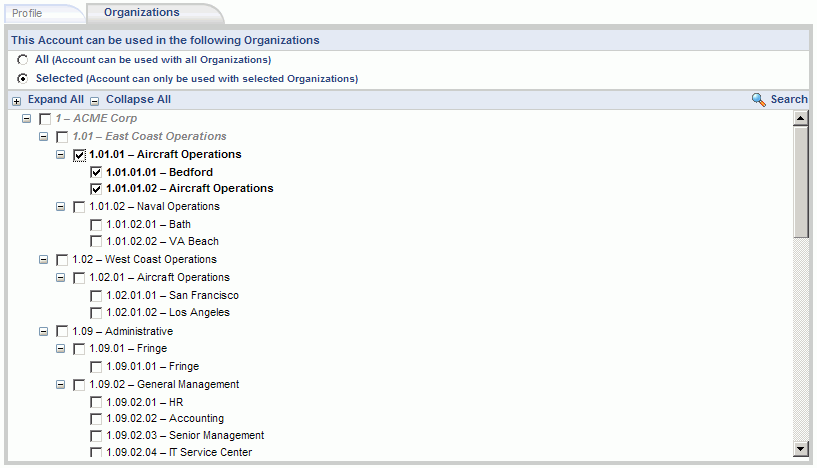
Clicking on the Organizations tab will display an edit screen where you can choose to limit which organizations the current account can be used with. By default, an Account can be used with All Organizations, so you only need to access this tab if you are interested in limiting which Organizations an Account can be used with.
On this tab, you can specify either All or Selected individual Organizations to include. Note that when you select a parent org, by default, all subordinate/children organizations are also selected.
As a visual aide, all selected organizations will appear in a bold font. Organizations listed in a light gray font indicate that a child organization is selected somewhere in that organizational hierarchy. It is currently not possible to select a parent organization without also including all children organizations.
Note: the Organization hierarchy referenced on this screen is the "Financials" organization hierarchy. This relationship is established via the Organization edit >> Financials tab (in the Reporting Hierarchies field set).
If you have many organizations and a deep Financials organizational hierarchy, you may need to use the Search facility to assist with locating an organization. Clicking on the Search link (![]() ) in the upper right will present a screen which resembles the following:
) in the upper right will present a screen which resembles the following:
